
Why Update Your Built-In Wardrobes with a DIY Wardrobe Makeover?
As a home improvement expert and interior designer, I often see the incredible potential hidden within older spaces. Your built-in wardrobes, though they might seem dated or dull, are prime candidates for a stunning transformation. A DIY wardrobe makeover can dramatically refresh your bedroom”s look and functionality without the expense of a full replacement. It offers a unique opportunity to personalize your space, transforming outdated built-in wardrobes into stylish, efficient storage solutions that perfectly match your home”s aesthetic and your personal needs.
Many homeowners and renters face a similar dilemma: their bedrooms are anchored by large, often uninspiring fitted wardrobes that were installed decades ago. These structures, while practical for storage, can dictate the entire room”s aesthetic, often dragging it down with tired finishes, clunky hardware, or an overall lack of modern appeal. The thought of replacing them can be daunting, both in terms of cost and the disruption it causes. This is precisely where the magic of a DIY wardrobe makeover comes in. It”s a brilliant, budget-friendly approach to achieve a significant design upgrade without needing to call in expensive contractors or embark on a major demolition project.
For those of us who love a good DIY challenge, or even for budget-conscious individuals just starting their home improvement journey, revamping your existing built-in storage is incredibly satisfying. It taps into your creativity, allowing you to infuse your personality into a functional element of your home. Imagine transforming drab, brown laminated doors into crisp, modern paneled fronts, or adding elegant trim that makes your wardrobe look like a bespoke piece of furniture. This article is your comprehensive guide to unlocking that potential. We”re going to explore innovative creative wardrobe renovation ideas that are not only achievable but also incredibly rewarding. From simple paint jobs to more intricate paneling additions, we”ll show you how to execute an effective built-in wardrobe renovation that will leave your bedroom feeling fresh, contemporary, and uniquely yours. Let”s dive in and discover how you can turn those overlooked storage units into a true bedroom highlight!
Assessing Your Wardrobe”s Potential for a Built-In Wardrobe Renovation
Before you even think about picking up a paintbrush or a roll of contact paper, the most crucial first step in any successful DIY wardrobe makeover is a thorough assessment of your existing structure. Think of yourself as an interior detective, scrutinizing every inch of your built-in wardrobe to understand its bones, its flaws, and most importantly, its hidden potential. This strategic evaluation will guide your choices and ensure your built-in wardrobe renovation is not only beautiful but also durable and practical.
Start by examining the structural integrity. Give the wardrobe a good shake (gently, of course!). Are the frames sturdy? Is there any noticeable sagging, warping, or water damage? Pay close attention to the base and the top where it meets the ceiling, as these areas are often susceptible to long-term wear. If the basic structure is sound, you”re already halfway there! Minor imperfections like small dents, scratches, or peeling laminate are easily addressed later, but significant structural issues might require professional attention or a different approach altogether.
Next, consider the doors. What style are they? Flat-panel, shaker, louvered, mirrored? Each style presents unique opportunities and challenges for a makeover. Flat-panel doors are a blank canvas, perfect for adding molding to create a shaker look or applying decorative wallpaper. Mirrored doors might need edge treatment or a full replacement if the glass is damaged. The material of the doors is also key: solid wood, MDF, chipboard with laminate, or veneer? This will determine your preparation steps, such as sanding and priming requirements. For an affordable built-in wardrobe update, working with the existing doors is almost always more cost-effective than replacing them entirely.
Don”t forget the hardware! Handles, knobs, and hinges play a huge role in the overall aesthetic. Are the hinges rusty or squeaky? Do the handles feel cheap or outdated? Swapping out old hardware for new, stylish pieces is one of the quickest and most impactful ways to modernize your wardrobe without a huge investment. This small detail can elevate the entire look, making it feel more intentional and cohesive with your desired style.
Finally, think about the interior. While the focus of this DIY wardrobe makeover is primarily external aesthetics, a quick look inside can inform your overall design vision. Is the internal layout functional? Could adding a few shelves, a new hanging rail, or some drawer organizers enhance its utility? Even a simple clean-out and fresh liner can make the interior feel renewed. Understanding the full scope of your wardrobe will help you formulate the best inexpensive closet renovation inspiration and create a detailed plan, ensuring every step you take brings you closer to your dream bedroom space.
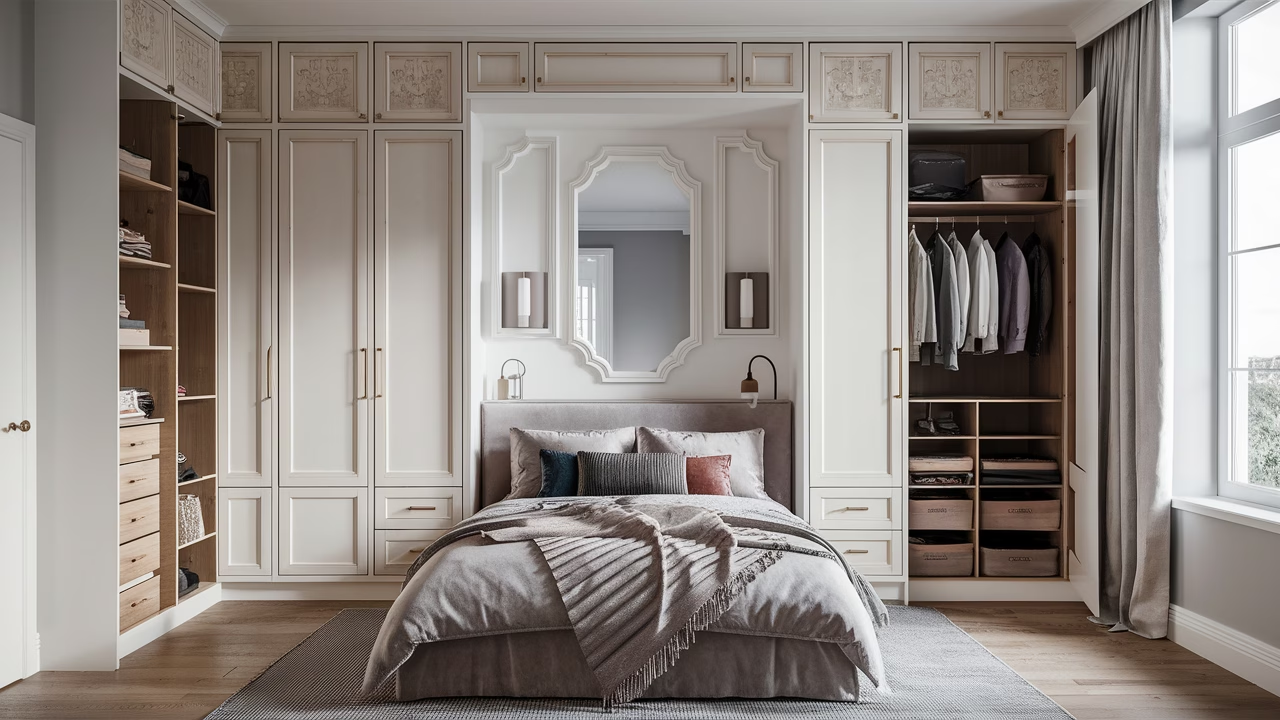
Creative DIY Ideas for Wardrobe Makeovers
Now that you”ve thoroughly assessed your wardrobe”s potential, it”s time for the exciting part: dreaming up the creative wardrobe renovation ideas that will transform your space! As a designer, I believe that every built-in wardrobe, no matter how humble its beginnings, holds the promise of becoming a bespoke feature in your room. The beauty of a DIY wardrobe makeover lies in the endless possibilities to personalize and uplift your bedroom decor on a budget, delivering an affordable built-in wardrobe update that truly reflects your style.
The Power of Paint: A Classic Transformation
Painting is arguably the most impactful and accessible way to give your wardrobe a fresh look. Forget the notion that painting laminate is impossible; with the right prep, primer, and paint, you can achieve a professional, durable finish. Consider a crisp white or a muted neutral for a minimalist, airy feel, or dive into a bold, rich color to make a statement. For a seamless look, paint the wardrobe the same color as your walls, creating a built-in effect that makes the room feel larger. Don”t be afraid to experiment with different sheens – a matte finish for a contemporary vibe or a subtle satin for durability and a touch of elegance. This simple step is fundamental to any easy fitted wardrobe makeover and offers immediate gratification.
Wallpaper and Contact Paper: Pattern, Texture, and Rent-Friendly Style
For those who love pattern or texture, or perhaps renters who need a reversible solution, wallpaper or peel-and-stick contact paper are brilliant choices. These materials come in an astonishing array of designs, from realistic wood grains and marble effects to vibrant geometric patterns and subtle textures like linen. Applying them to flat-panel wardrobe doors can instantly add depth and interest to your bedroom. The key here is meticulous preparation: ensure the surface is clean, smooth, and free of dust for optimal adhesion. Measure carefully and take your time during application to avoid bubbles and wrinkles. This approach provides fantastic inexpensive closet renovation inspiration, allowing for dramatic changes with minimal commitment.
Elevating with Molding and Trim: The Custom Look
One of my favorite tricks for a high-end, custom look on a budget is adding molding or trim to plain wardrobe doors. This technique allows you to create elegant shaker-style panels, decorative frames, or even a sophisticated wall paneling effect directly onto your existing doors. Materials like lightweight MDF strips or pre-primed wood trim are readily available and surprisingly easy to work with. Measure and cut your pieces to create your desired design, attach them with strong adhesive and small brad nails (if suitable for your door material), fill any gaps, sand smooth, and then paint everything to match. This method turns a basic wardrobe into a piece of architectural interest, offering profound creative DIY ideas for wardrobe makeovers.
Hardware: The Jewelry of Your Wardrobe
Never underestimate the power of new hardware. Dated knobs and pulls can instantly give away the age of your wardrobe. Swapping them out for modern, stylish replacements is a quick and impactful update. Consider sleek bar pulls for a contemporary feel, rustic cup pulls for a farmhouse vibe, or elegant crystal knobs for a touch of glamour. This small change makes a big difference in the overall finish and can completely alter the perceived quality of your upcycling fitted wardrobes project. Explore options at your local home improvement store; you”ll be amazed at the variety and affordability.
Beyond the Doors: Integrated Design
Think beyond just the door fronts. Consider integrating your wardrobe into the wider room design. Could you add a small, slim bookcase to one end? Or perhaps build out a simple desk area adjacent to it? For clever solutions often seen in larger home improvement stores, known colloquially as a “store hack,” you might find modular shelving units or drawer inserts that can be adapted to fit existing gaps or provide integrated functionality. This extends your DIY wardrobe makeover beyond mere aesthetics, enhancing the utility and flow of your entire bedroom space. These creative additions are fantastic sources of affordable built-in wardrobe updates, truly transforming the entire wall rather than just the storage unit.
Step-by-Step Guide to Upcycling Fitted Wardrobes
Embarking on a DIY wardrobe makeover, especially when upcycling fitted wardrobes, requires a methodical approach. As your guide, I”ll walk you through each step, ensuring you have the detailed instructions needed to transform your outdated units into a stunning feature. This is where we truly address the competitor gap by providing comprehensive, actionable advice, making your easy fitted wardrobe makeover a success from start to finish. Patience and precision are your best friends here!
Step 1: The Great Emptying and Disassembly
First things first: empty your entire wardrobe. This is a perfect opportunity to declutter and organize! Once empty, carefully remove the wardrobe doors. Most fitted wardrobes have hinge screws that are relatively easy to undo. Label the doors and hinges if necessary, especially if they are not interchangeable, to ensure easy reinstallation. Remove all existing hardware – handles, knobs, and any decorative trim. Keep screws and hardware organized in labeled bags or containers so you don”t lose anything vital.
Step 2: Thorough Cleaning and Surface Preparation
This is arguably the most crucial step for a durable finish. Using a degreaser cleaner (like sugar soap or a strong all-purpose cleaner), thoroughly clean all surfaces you intend to paint or cover. Grease, grime, and dust are enemies of good adhesion. Rinse with clean water and allow to dry completely. For laminate or previously painted surfaces, a light sanding with fine-grit sandpaper (around 180-220 grit) will create a "key" for the primer to adhere to. If you have solid wood or veneer, sand more thoroughly to remove old finishes and rough up the surface. Fill any holes, dents, or imperfections with appropriate wood filler, allow to dry, and then sand smooth until flush with the surface. Wipe away all sanding dust with a damp cloth or tack cloth.
Step 3: Priming for Perfection
Priming is non-negotiable, especially when dealing with glossy laminates or dark wood. A good adhesion primer – specifically designed for challenging surfaces – will ensure your paint sticks properly and prevents issues like chipping or peeling down the line. Apply one to two thin, even coats of primer according to the manufacturer”s instructions, allowing adequate drying time between coats. Don”t skip this step; it”s the foundation of a long-lasting DIY wardrobe makeover. If you are adding molding in the next step, you might prime the doors first, or you can prime after the molding is attached, ensuring good coverage over all new surfaces.
Step 4: Adding Decorative Elements (If Applicable)
If your creative wardrobe renovation ideas include adding molding, paneling, or other decorative trims, now is the time. Carefully measure and cut your MDF or wood strips to the desired lengths. For shaker-style panels, ensure all corners are cut at a 45-degree angle for a clean mitered joint. Attach the trim using a strong adhesive and, for extra security, small brad nails. A brad nailer (manual or electric) makes this task much easier and provides a professional finish. Fill any nail holes or gaps with caulk or wood filler, then lightly sand once dry. This creates a seamless, built-in look.
Step 5: The Painting Process
Once your primer (and any added trim) is fully dry and sanded smooth, it”s time for the color! Choose a high-quality paint, such as a durable furniture paint or a hybrid enamel, which offers a hard-wearing finish. For a smooth result, use a good quality roller (foam or short-nap microfiber are excellent for doors) for large flat areas and a high-quality brush for corners and edges. Apply multiple thin coats rather than one thick coat, allowing each coat to dry completely before applying the next. This prevents drips and ensures a robust finish. Lightly sand with a very fine-grit sanding sponge (around 320-400 grit) between coats for an ultra-smooth surface. For the ultimate longevity, consider a clear protective topcoat or sealer, especially if your wardrobe sees a lot of use.
Step 6: Reinstalling Doors and Hardware
Once all painted surfaces are completely cured (which can take several days, so be patient!), it”s time to reattach the doors and install your new hardware. Carefully lift and re-hang the doors, aligning them with the existing hinge holes. Install your chosen new handles, knobs, or pulls. Take a step back and admire your handiwork! This is a fantastic moment to take those "after" photos to truly appreciate the transformation – perhaps even conceptualizing a "before and after" video to share your incredible journey!
Step 7: The Finishing Touches and Styling
Clean up any dust or paint splatters. If you”re considering any interior organization, now is the time to add it back in. Finally, style the surrounding area. Add a new rug, some plants, or artwork to complement your beautifully refreshed wardrobe. You”ve not just renovated a piece of furniture; you”ve invigorated your entire bedroom with your hard work and creativity, a testament to the power of upcycling fitted wardrobes. You”ll find immense satisfaction in knowing you achieved this remarkable upgrade yourself, making this an inspiring project for any DIY enthusiast.
Budget-Friendly Bedroom Paneling Options
One of the most effective ways to elevate a simple wardrobe – and indeed, an entire bedroom – is through the strategic use of paneling. It adds architectural interest, texture, and a sense of custom craftsmanship that often belies its actual cost. For an affordable built-in wardrobe update, exploring various budget-friendly bedroom paneling options can dramatically impact the final look and feel of your DIY wardrobe makeover. As an expert, I”ve seen how clever use of materials can make a significant design statement without breaking the bank.
MDF and Plywood: Versatility and Affordability
Medium-density fiberboard (MDF) and thin plywood sheets are champions of budget-friendly paneling. They are relatively inexpensive, widely available at home improvement stores, and incredibly versatile. You can cut MDF into strips to create a classic shaker-style paneling directly onto your existing flat wardrobe doors or adjacent walls. This gives the illusion of custom cabinetry. For a more traditional look, larger sheets of plywood can be cut to fit entire door panels or to create a feature wall effect around the wardrobe. Both materials take paint beautifully, allowing you to seamlessly integrate the paneling with your wardrobe”s new color scheme. Remember to seal the edges of MDF with a primer to prevent paint absorption inconsistencies.
Tongue and Groove Panels: Classic Charm Made Easy
For a cottage, farmhouse, or coastal aesthetic, tongue and groove panels are an excellent choice. These panels slot together easily, making installation relatively straightforward for a competent DIYer. They can be applied directly to wardrobe doors or the wall beside your wardrobe, creating a charming, textured look. Typically made from pine, they can be painted, stained, or simply sealed for a natural finish. While slightly more visible in terms of individual planks, the effect is instantly transformative and offers a warmth that other materials might not. This method is a tried-and-true solution for achieving a cozy, personalized feel with an easy fitted wardrobe makeover.
Peel-and-Stick Wallpaper or Vinyl: The Renter-Friendly Revelation
For renters or those seeking a commitment-free solution, peel-and-stick wallpaper or vinyl is a game-changer for budget-friendly bedroom paneling. These products come in an incredible range of designs – from realistic wood planks and shiplap effects to sophisticated geometric patterns and textured fabrics. They are easy to apply, require minimal tools, and, crucially, are removable without damaging the underlying surface. This makes them perfect for an inexpensive closet renovation inspiration where flexibility is key. You can achieve the look of expensive paneling or a custom finish with just a few rolls, proving that stunning transformations don”t require permanent alterations.
Beyond Traditional Paneling: Creative Material Hacks
Don”t limit your imagination to conventional materials. For truly unique DIY bedroom paneling tips, consider "store hacks" where you adapt readily available items for paneling. For example, using textured wall panels designed for splashbacks or decorative screens can provide an instant modern update. Even fabric, carefully stretched and adhered to thin panels, can create a soft, upholstered look. The key is to think outside the box and consider how different materials can be cut, adhered, and finished to achieve your desired aesthetic. This approach allows for incredible customization while keeping costs low, making your built-in wardrobe renovation project truly one-of-a-kind. These budget-friendly options ensure that a lack of funds never means a lack of style for your new and improved built-in wardrobe.
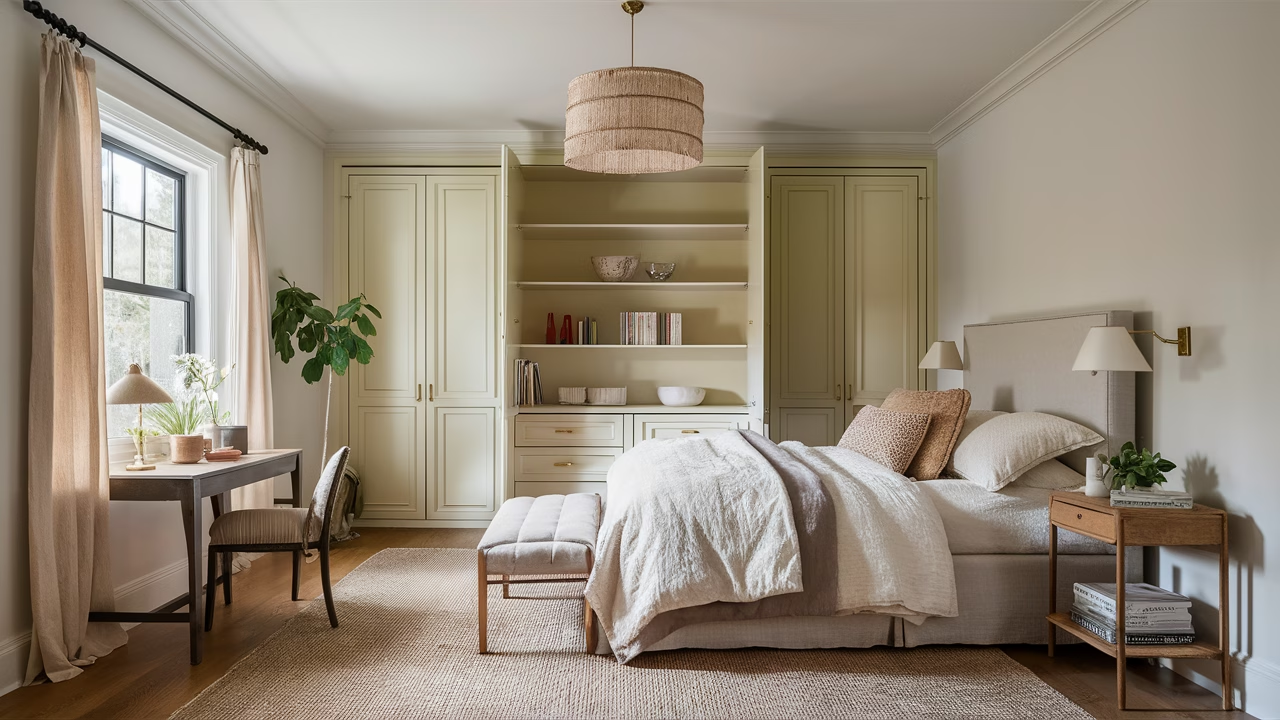
Conclusion: Bringing Your Wardrobe Renovation Vision to Life
As we”ve journeyed through the myriad possibilities for transforming your existing storage, it”s clear that a DIY wardrobe makeover is more than just a home improvement project; it”s an act of creative empowerment. We”ve explored everything from the critical initial assessment to the hands-on steps of painting, adding trim, and applying various budget-friendly bedroom paneling options. You now have a comprehensive understanding of how to tackle a full-scale built-in wardrobe renovation, turning what was once an overlooked or outdated feature into a personalized highlight of your bedroom.
The beauty of upcycling fitted wardrobes lies in its accessibility. You don”t need a huge budget or advanced carpentry skills to achieve truly stunning results. With patience, careful planning, and a willingness to get hands-on, you can create a space that feels entirely new. Remember, every scratch filled, every coat of paint applied, and every piece of trim meticulously fitted contributes to a bespoke finish that reflects your unique taste. This process is not just about updating furniture; it”s about creating a living space that genuinely resonates with you and enhances your daily life.
We”ve armed you with detailed, step-by-step instructions to ensure your easy fitted wardrobe makeover is a smooth and rewarding experience. By understanding how to address common challenges and implement clever design solutions, you”re well-equipped to avoid pitfalls and achieve a professional-looking result. Think about the joy of opening doors to a wardrobe that perfectly matches your style, or the satisfaction of knowing you breathed new life into an old structure with your own hands. This sense of accomplishment is invaluable.
So, take that final look at your current wardrobe, then look ahead to the beautiful transformation awaiting you. Don”t be afraid to experiment with creative wardrobe renovation ideas, draw inspiration from your surroundings, and tailor every choice to your personal aesthetic. Whether you opt for a sleek, modern finish or a charming, paneled look, the outcome will be an affordable built-in wardrobe update that not only enhances your home”s value but also brings you immense personal satisfaction. Get started on your inexpensive closet renovation inspiration today, and watch your bedroom transform into the stylish, organized sanctuary you”ve always dreamed of. Your custom, refreshed space is just a few DIY steps away. We can”t wait to see what you create!

