
How do you install peel and stick tiles for a bathroom renovation?
Successful peel and stick tile installation requires proper surface preparation, precise measurement, and methodical application of each tile. This bathroom tile installation guide will show you exactly how to achieve professional results.
TL;DR – Step-by-Step Summary
- Choose tiles wisely: Select water-resistant peel and stick tiles specifically rated for bathroom use.
- Prep the area: Clean, dry, and smooth your wall or floor surfaces thoroughly.
- Essential tools: Utility knife, measuring tape, level, spacers, and a rubber roller.
- Measure & cut: Plan your layout and cut tiles accurately before removing backing.
- Apply systematically: Start from center or straight edge, pressing firmly to eliminate air bubbles.
- Seal properly: Use silicone sealant around edges for enhanced moisture protection.
- Simple maintenance: Regular gentle cleaning keeps your peel and stick tile installation looking fresh.
Getting Started with Peel and Stick Tiles
Understanding the Benefits of Peel and Stick Tiles
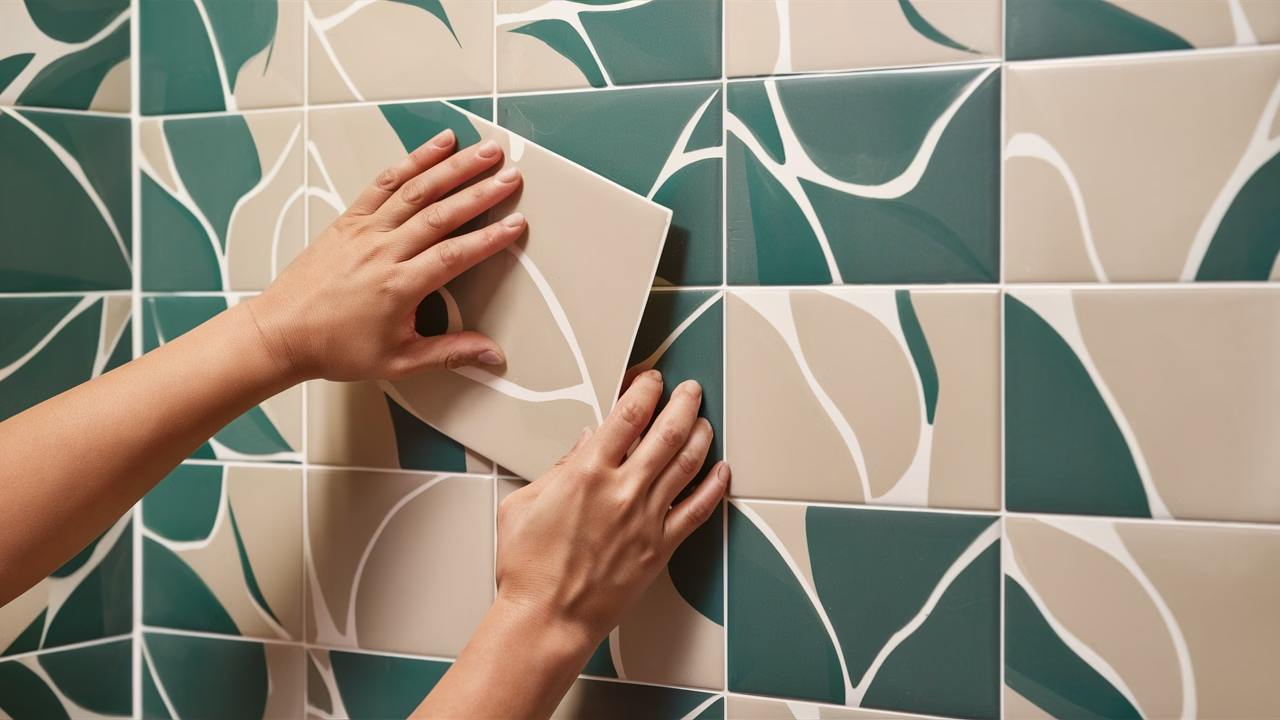
Want to transform your bathroom in a single weekend without the mess and expense of traditional tiling? Peel and stick tile installation offers the perfect solution for your DIY bathroom renovation. These innovative tiles combine convenience with style, making professional-looking results achievable for any homeowner.
Key peel and stick tile benefits include:
- Cost-effective: Complete your DIY bathroom renovation at a fraction of traditional tile installation costs.
- Quick installation: No waiting for adhesives to cure—your bathroom tile installation guide project finishes in hours, not days.
- Simple tools required: Basic equipment like a utility knife and level are all you need.
- Clean process: No mortar mixing or dust means maintaining peel and stick tiles starts with a mess-free installation.
Today’s peel and stick tiles come in an impressive range of designs—from realistic marble and wood-look finishes to contemporary geometric patterns. Whether your bathroom style is minimalist spa or bold contemporary, you’ll find options that deliver both beauty and practicality.
Choosing the Right Peel and Stick Tiles for Your Bathroom
Selecting the right tiles ensures your DIY bathroom renovation stands up to daily use and moisture exposure:
- Water resistance rating: Always choose tiles specifically labeled for bathroom use with proper moisture barriers.
- Surface compatibility: Smooth, non-porous tiles work best for walls, while textured anti-slip options suit bathroom floors.
- Design considerations: Light colors create spaciousness in compact bathrooms, while bold patterns add personality and focal points.
Remember, quality matters significantly in peel and stick tile installation. Invest in bathroom-rated tiles to avoid premature lifting and ensure your renovation investment lasts.
Preparing Your Bathroom for Tile Installation
Cleaning and Prepping the Surface
Proper surface preparation determines whether your peel and stick tile installation lasts years or fails within months. This critical step in any bathroom tile installation guide cannot be rushed.
- Deep clean with degreasing cleaner or isopropyl alcohol to remove soap residue, oils, and grime completely.
- Allow surfaces to dry thoroughly—any moisture will compromise adhesion.
- Fill cracks and smooth rough patches with appropriate filler, then sand until even.
- Prime previously painted surfaces if paint appears loose or if colors might show through your tiles.
Think of this prep work as the foundation of your DIY bathroom renovation. Skipping these steps is the primary cause of peel and stick tile failure, so invest the time upfront for lasting results.
Tools and Materials You Will Need
Gather these essential tools before beginning your peel and stick tile installation:
| Tool | Purpose |
|---|---|
| Utility knife | Clean cuts around fixtures and edges |
| Measuring tape | Accurate layout planning and tile spacing |
| Level | Maintain straight rows and professional appearance |
| Rubber roller | Eliminate air bubbles and ensure strong adhesion |
| Spacers (optional) | Consistent spacing for grout-style appearance |
Set up adequate lighting and organize your workspace for efficiency. When working around plumbing fixtures, have masking tape and a stable cutting surface ready for precise trimming.
Step-by-Step Guide to Installing Peel and Stick Tiles
Cutting and Measuring Tiles
Strategic planning prevents costly mistakes and ensures professional results in your bathroom tile installation guide project. Always start with a complete dry layout before removing any backing.
- Measure precisely: Mark your center points and use them as reference guides throughout installation.
- Plan your cuts: Position partial tiles in less visible corners or edges for the cleanest appearance.
- Score and snap: Use a sharp utility knife with a straight edge rather than trying to saw through tiles.
For complex cuts around outlets or curves, create a paper template first, then trace onto your tile for accuracy. This extra step prevents waste and ensures perfect fits.
Applying the Tiles Correctly
Patience during application separates amateur DIY bathroom renovation attempts from professional-looking results. Once positioned, peel and stick tiles resist repositioning without damaging the adhesive.
- Start strategically: Begin from your center point or a prominent straight edge like a tub surround.
- Gradual backing removal: Peel backing in sections rather than all at once for better control.
- Firm, even pressure: Use a rubber roller to eliminate air bubbles and activate the adhesive fully.
Work systematically row by row, checking alignment frequently. This methodical approach prevents the frustration of discovering crooked rows when you’re halfway finished.
Cost Guide: How Much Does It Cost to Install Peel and Stick Bathroom Tiles?
| Budget Range | Cost Per Sq Ft (SGD) | Notes |
|---|---|---|
| Low-End | $1.50 – $3.00 | Basic vinyl, limited design options |
| Mid-Range | $3.00 – $5.00 | Enhanced patterns, water-resistant, improved adhesion |
| High-End | $5.00 – $12.00 | Premium textures, superior durability, designer patterns |
Finishing Touches and Maintenance Tips
Grouting and Sealing the Tiles

The finishing steps in your peel and stick tile installation determine long-term performance and appearance. Your approach depends on your chosen tile style and bathroom exposure levels.
For tiles requiring grout lines:
- Use vinyl-compatible grout or flexible filler to prevent cracking under tile movement.
- Clean excess immediately with a barely damp sponge to avoid haze formation.
Edge sealing proves more critical for bathroom applications. Apply clear silicone sealant along:
- All edges exposed to water spray, including tub and sink perimeters
- Corner joints and seams where tiles meet different materials
Proper Care and Maintenance of Peel and Stick Tiles
Maintaining peel and stick tiles requires minimal effort when you follow the right approach, keeping your DIY bathroom renovation looking fresh for years.
- Clean with pH-neutral cleaners and soft mops—avoid harsh chemicals and abrasive scrubbers.
- Inspect quarterly for lifting corners and address issues immediately with additional adhesive or sealant.
- Protect floor tiles from furniture scratches by using felt pads and avoiding dragging heavy items.
Consistent care extends the life of your peel and stick tile installation significantly. Small preventive measures save major repairs later.
Final Thoughts
Mastering peel and stick tile installation opens the door to affordable, stunning DIY bathroom renovation results. With proper preparation, quality materials, and patient application, you can transform your space in a weekend while building confidence for future projects. Your beautifully renovated bathroom will serve as a daily reminder of what you can accomplish.
Frequently Asked Questions
- Is it necessary to remove old tile adhesive before tiling?
When installing over existing surfaces, smooth out any adhesive residue or raised areas. Uneven surfaces will telegraph through your new peel and stick tile installation and cause premature failure. - Can I install peel and stick tiles in a shower?
Direct shower installation isn’t recommended due to constant water exposure. Focus your DIY bathroom renovation on areas with normal humidity levels for best results. - What happens if a tile lifts up?
Address lifting immediately by adding compatible adhesive or replacing the tile entirely. Press firmly and reseal edges to prevent moisture infiltration. - How long do peel and stick tiles last?
Quality bathroom-rated tiles properly installed can last 5–10 years or more. Regular maintenance and proper ventilation extend their lifespan significantly. - Are peel and stick tiles removable?
Yes, gentle heat from a hair dryer softens the adhesive for easier removal with minimal surface damage, making them ideal for rental properties. - Do these tiles need special cleaners?
Standard pH-neutral cleaners work perfectly for maintaining peel and stick tiles. Avoid bleach, ammonia, or abrasive products that can damage the surface.

