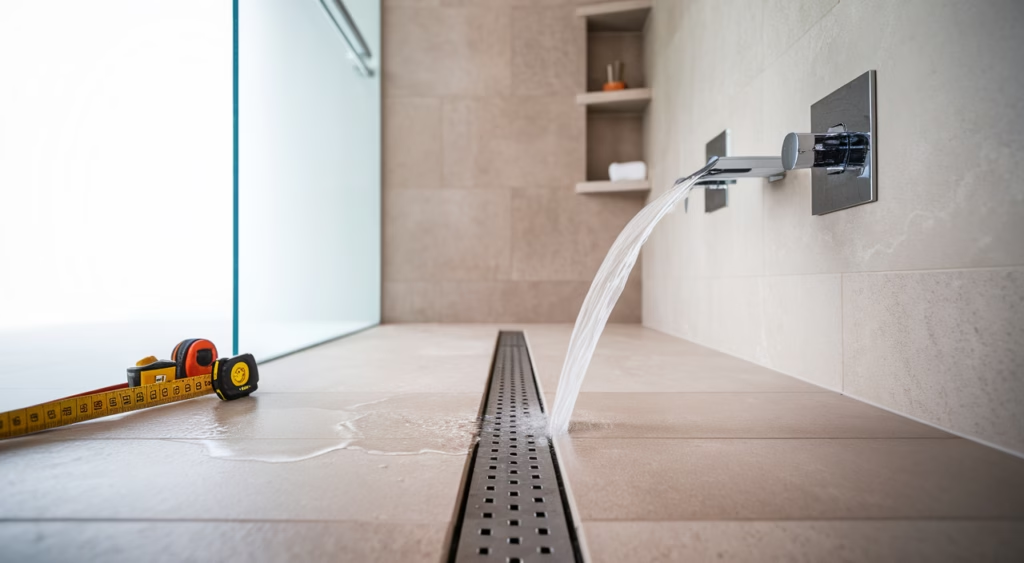
How Can You Effectively Fix Drainage Problems in a Bathroom?
As a professional plumber and home improvement expert, I can tell you that few things are as frustrating as persistent water pooling in your shower or a slow-draining bathroom floor. These aren’t just minor inconveniences; they’re often clear indicators of underlying bathroom drainage issues that, if left unaddressed, can lead to serious problems like water damage, mold growth, and costly structural repairs. When it comes to effective DIY bathroom drainage solutions, understanding the root cause is the first step, and more often than not, an improper shower floor slope is the silent culprit.
Many homeowners assume a clog is always the problem, reaching for chemical drain cleaners or plungers. While clogs are certainly common, if you’ve cleared the drain and still find water standing long after your shower, you’re likely dealing with a fundamental design flaw: your shower floor isn’t pitched correctly towards the drain. This guide is your comprehensive resource for understanding, diagnosing, and ultimately resolving these frustrating issues, providing detailed written instructions and alternative solutions that competitor videos often overlook. We’re going to dive deep into how to properly fix drainage problems in a bathroom, ensuring your shower functions as it should – efficiently and effectively.
Identifying the Shower Floor Slope Problem
Before you can begin any effective bathroom slope repair, you need to be absolutely certain that an inadequate shower floor slope is indeed the cause of your drainage woes. Don’t jump to conclusions; proper diagnosis saves time, effort, and money. A correctly sloped shower floor is designed to channel water directly into the drain, leaving virtually no standing water once the shower is turned off. If your shower isn’t doing that, it’s time to investigate.
Visual Inspection and the Water Test
The simplest way to check your shower floor’s pitch is through a visual inspection followed by a controlled water test. Start by looking closely at your shower floor, especially around the drain. Are there obvious low spots away from the drain? Does the floor appear relatively flat? Sometimes, the slope is so subtle, it’s hard to tell by eye alone.
Next, perform a water test. Turn on your shower, letting the water run for a few minutes, mimicking a typical shower. Then, turn it off. Observe carefully. Does the water quickly and efficiently flow into the drain? Or does it collect in puddles along the edges, in corners, or at the shower’s entrance? Pay particular attention to any areas where water persistently stands for more than a few minutes after the shower has stopped. If you see standing water, even small amounts, you have a shower floor slope problem.
Another useful trick is to use a small ball or marble. Place it at various points on your shower floor and observe which way it rolls. Ideally, it should consistently roll towards the drain. If it sits still or rolls in an unexpected direction, your slope is off. For a more precise measurement, use a spirit level. Place it on the shower floor at various angles, always orienting it so one end is closer to the drain. You should see a consistent slight decline towards the drain, typically 1/4 inch per foot (or about 2%) for optimal drainage. This attention to detail in identification is crucial for any successful fixing shower floor slope tips.
Understanding the Consequences of Poor Slope
It’s not just about aesthetics or a minor annoyance. A poorly sloped shower floor can lead to significant issues. Standing water creates a perfect breeding ground for mold and mildew, which can pose health risks and are notoriously difficult to clean. Beyond that, constant moisture can compromise your grout lines and even penetrate your waterproofing layers over time, leading to leaks into your subfloor or adjacent walls. This can cause structural damage, rot, and even affect rooms below your bathroom. Addressing the bathroom drainage issues stemming from poor slope isn’t just a repair; it’s an investment in the longevity and hygiene of your home.

Methods to Correct the Slope
Now that you’ve confidently identified an improper shower floor slope, it’s time to explore the solutions. There isn’t a one-size-fits-all approach, and the best method for you will depend on the severity of the problem, your budget, and your comfort level with DIY projects. We’ll detail two primary, effective bathroom slope repair methods: using a self-leveling compound for minor adjustments and installing a new shower pan for more significant overhauls. Each method offers distinct advantages and challenges, and I’ll walk you through the detailed steps, materials, and crucial considerations for both.
Option 1: Using Self-Leveling Compound
A self-leveling compound is a fantastic option for correcting minor to moderate slope issues in an existing shower. It’s designed to flow out and create a perfectly flat surface, which you can then use as a base to build the correct slope. This method is generally less invasive and less costly than a full shower pan replacement, making it a popular choice for easy bathroom drainage fixes when the underlying structure is still sound.
When to Use Self-Leveling Compound
This method is ideal when your shower floor has inconsistent low spots, minor depressions, or a generally inadequate slope but is otherwise in good condition, without major cracks or structural damage. It’s not a solution for extensive structural problems or for building a completely new shower base from scratch, but for refining an existing one, it’s highly effective.
Tools and Materials You’ll Need:
- Self-leveling underlayment compound (check product specifics for bathroom/wet area suitability)
- Primer for self-leveling compound
- Large mixing bucket
- Heavy-duty drill with a mixing paddle attachment
- Trowel or squeegee
- Spiked shoes (optional, but highly recommended for walking on wet compound)
- Painter’s tape and plastic sheeting
- Safety gear: gloves, eye protection, respirator
- Shop vacuum
- Level and measuring tape
- Drain extension (if raising the floor significantly)
Step-by-Step Instructions:
- Prepare the Area: First, remove the shower drain cover and any other fixtures. Thoroughly clean the entire shower floor. Use a shop vacuum to remove all dust, dirt, and debris. Any contaminants can compromise the adhesion of the primer and compound.
- Seal and Protect: Use painter’s tape and plastic sheeting to protect walls, the shower curb, and the area outside the shower from splashes. Critically, you need to seal off the shower drain opening to prevent the compound from flowing into your plumbing. Use a temporary plug or tape over the drain, ensuring it’s watertight but easily removable later. If your floor needs to be raised considerably, you might need a drain extension kit to bring the drain flush with the new floor height.
- Apply Primer: Following the manufacturer’s instructions, apply the recommended primer to the entire shower floor. Primer is essential for ensuring proper adhesion of the self-leveling compound. Allow it to dry completely, which can take a few hours.
- Mix the Compound: This is a critical step for success. Read the self-leveling compound’s instructions meticulously regarding water-to-powder ratios. Using your heavy-duty drill with a mixing paddle, slowly add the powder to the specified amount of clean, cool water in your large mixing bucket. Mix until you achieve a smooth, lump-free consistency, similar to pancake batter. Avoid over-mixing, which can introduce too much air.
- Pour and Spread: Starting from the farthest point from the shower drain, carefully pour the mixed compound onto the primed shower floor. The compound will naturally begin to spread and find its level.
- Create the Slope: Here’s where your expertise comes in to how to improve shower drainage. While self-leveling compound naturally seeks a flat plane, you need to *gently* guide it to create the desired slope towards the drain. Use a flat trowel or squeegee, working from the outer edges inwards towards the drain. Don’t overwork it; just coax it along. The goal is a consistent 1/4 inch per foot (or 2%) slope. You might need to use a level to periodically check your work, ensuring the pitch is consistent.
- De-airing (Optional but Recommended): If you have spiked shoes, now is the time to put them on. Carefully walk over the wet compound to help release any trapped air bubbles, which can weaken the surface.
- Cure Time: Allow the compound to cure fully, as specified by the manufacturer (this can range from 12-72 hours). Do not walk on it or expose it to water during this period. Adequate curing is essential for strength and durability.
- Finishing Touches: Once cured, inspect the surface. It should be hard and smooth with the correct slope. You can then prepare the surface for tiling or other finishes, ensuring the drain is cleared and reinstalled correctly.
Pros and Cons of Self-Leveling Compound:
- Pros: Relatively quick application, less labor-intensive than full demolition, cost-effective for minor issues, creates a smooth sub-surface for new tiles.
- Cons: Not suitable for major structural repairs, requires precise mixing and careful application for proper slope, might raise the overall floor height slightly, necessitating a drain extension.
Option 2: Installing a Shower Pan
When the existing shower floor slope is severely off, the subfloor is damaged, or you’re undertaking a complete bathroom renovation, installing a new shower pan is often the most robust and lasting solution. This method essentially gives you a fresh start, allowing for precise control over the slope and ensuring a fully waterproof foundation. It’s a more involved process than using self-leveling compound but offers superior results for significant fix drainage problems in a bathroom scenarios.
When to Consider Installing a Shower Pan
Choose this option if your existing shower base is deteriorated, if the slope is drastically incorrect (e.g., sloping away from the drain on multiple sides), if you’re experiencing leaks due to a failed waterproofing membrane, or if you simply want to entirely refresh your shower’s foundation. This is the definitive effective bathroom slope repair for major issues.
Types of Shower Pans:
- Pre-fabricated Shower Pans: These are ready-made units, typically acrylic, fiberglass, or solid surface materials, that come with an integrated slope and drain opening. They are quicker to install but offer less customization in terms of size, shape, and tile finishes.
- Custom Tiled Shower Pans (Mortar Bed): This method involves building a custom base using a mortar mix, over which tiles are laid. This is highly customizable, allowing for precise slope creation and integration with your bathroom’s design. This guide will focus on the custom tiled method as it directly addresses slope correction through construction.
Tools and Materials You’ll Need (for Custom Tiled Pan):
- Demolition tools: pry bar, hammer, safety glasses, heavy gloves
- Shop vacuum
- Plywood or cement board (for subfloor repair/reinforcement)
- Shower drain assembly (clamping ring style is common)
- PVC cement and primer
- Waterproofing membrane (liquid or sheet, e.g., Kerdi, RedGard)
- Deck mud/mortar mix (sand and Portland cement ratio is crucial, often 4:1)
- Water
- Mixing tub and hoe or heavy-duty drill with mixing paddle
- Trowels (flat and notched)
- Screed boards (for forming slope guides)
- Level, measuring tape, pencil
- Rubber mallet
- Safety gear: respirator (especially for mixing dry mortar), gloves, eye protection
Step-by-Step Instructions:
- Demolition: Carefully remove existing tiles, waterproofing, and the old shower base down to the subfloor. Be cautious not to damage surrounding walls or plumbing. Inspect the subfloor for any damage; repair or reinforce with plywood or cement board as needed.
- Drain Installation: Install a new clamping ring shower drain assembly. This involves connecting the drain to the existing waste pipe with PVC cement, ensuring a tight, leak-proof seal. The drain’s clamping ring will eventually secure the waterproofing membrane.
- Pre-Slope Mortar Bed: This is a crucial step for fixing shower floor slope tips. Mix a stiff, damp mortar (deck mud). Apply a thin layer (approx. 1/4 inch at the drain) across the entire subfloor, extending to the curb. Use a level and screed boards to create a *pre-slope* of 1/4 inch per foot towards the drain. This initial slope ensures that any water that gets *under* your waterproofing membrane will still be directed to the drain, providing an essential backup. Allow this pre-slope to cure completely (24-48 hours).
- Waterproofing: Apply your chosen waterproofing membrane over the pre-sloped mortar bed. If using a liquid membrane, apply multiple coats according to manufacturer instructions, extending up the walls at least 6-12 inches and over the shower curb. If using a sheet membrane, carefully cut and adhere it, ensuring all seams are properly sealed and integrated with the drain’s clamping ring. This step is critical to prevent leaks and is where many competitor videos skimp on detail.
- Final Mortar Bed (Main Slope): Once the waterproofing is dry and secure, apply a second layer of deck mud. This layer will create the final, visible slope for your tiles. Start at the drain, filling in the area. Using screed guides, build up the mortar bed so that it has a consistent 1/4 inch per foot slope from all edges of the shower down to the drain. The thickness at the curb will be greater than at the drain. Use your trowel to smooth and compact the mortar.
- Curing and Tiling: Allow the final mortar bed to cure completely for several days (up to 72 hours or more, depending on thickness and humidity). Once cured, you can proceed with tiling your shower floor, using thin-set mortar designed for wet areas and following standard tiling practices.
Pros and Cons of Installing a Shower Pan:
- Pros: Creates a highly durable, custom, and perfectly sloped base; allows for complete waterproofing; ideal for major renovations or severe slope issues; virtually eliminates bathroom drainage issues related to slope.
- Cons: More labor-intensive and time-consuming, requires significant demolition, higher material costs, demands a good understanding of construction principles and plumbing.

Additional Tips for Preventing Drainage Problems
Even after you’ve implemented effective bathroom slope repair and achieved perfect drainage, proactive maintenance is key to keeping your shower functioning flawlessly. As a professional, I always advise clients that prevention is far easier and cheaper than repair. By adopting a few simple habits and preventative measures, you can significantly reduce the likelihood of encountering bathroom drainage issues in the future and keep your newly fixed shower floor slope performing optimally.
Regular Cleaning and Maintenance
One of the easiest easy bathroom drainage fixes to prevent problems is consistent cleaning. Hair, soap scum, and body oils are the primary culprits for most shower clogs. Install a good quality drain screen or hair catcher. These inexpensive devices sit over the drain and catch hair and other debris before it enters your plumbing system. Make it a habit to clean this catcher after every shower or at least weekly. Removing collected debris prevents it from building up into a stubborn clog.
Beyond the drain, regularly clean the entire shower area. Soap scum buildup on tiles and grout can contribute to grime that eventually finds its way into the drain. Use appropriate bathroom cleaners and a brush to keep surfaces smooth and free of residue. A monthly rinse of the drain with a mixture of hot water and baking soda followed by white vinegar can also help break down minor greasy buildups, acting as a gentle, natural drain cleaner. This is a common DIY bathroom drainage solution that actually works for minor clogs.
Mind What Goes Down the Drain
This might seem obvious, but it’s often overlooked. Avoid pouring grease, coffee grounds, or harsh chemicals down your shower drain. While some might think hair is the main problem, foreign objects and sticky substances can exacerbate the issue, creating blockages that are difficult to remove. Educate everyone using the shower on proper drain etiquette. For those asking how to improve shower drainage, understanding that drains aren’t garbage disposals is fundamental.
Inspect Grout and Sealant Regularly
The integrity of your shower’s grout and caulk lines is vital for preventing water from seeping into your subfloor and walls. Over time, grout can crack and caulk can degrade, creating pathways for moisture. Make it a point to visually inspect these areas every few months. If you notice any cracking, crumbling, or peeling, address it immediately. Re-grout or re-caulk as necessary. This is not just about aesthetics; it’s a critical waterproofing measure that safeguards your home’s structure. Promptly addressing these small issues can prevent much larger, more expensive bathroom drainage issues down the line.
Consider a Water Softener
If you live in an area with hard water, mineral deposits can build up in your pipes and on your shower fixtures, contributing to slower drainage and soap scum accumulation. Installing a whole-house water softener can mitigate this problem significantly, reducing mineral buildup and extending the life of your plumbing system and fixtures. While a larger investment, it offers comprehensive protection against many water-related problems, not just drainage.
FAQs: Common Concerns About Fixing Shower Floor Slope
Having tackled countless bathroom drainage issues, I know homeowners often have a lot of questions before diving into a repair. Here are some of the most common concerns about fixing shower floor slope tips, along with my professional advice.
1. How long will it take to fix the shower floor slope?
The time investment varies significantly depending on the method chosen. Using a self-leveling compound for minor adjustments might take a full weekend – one day for preparation and application, and then 24-72 hours for curing before you can proceed with tiling. A full shower pan installation, however, is a multi-day project, often spanning several days to a week or more, accounting for demolition, multiple mortar layers, waterproofing, and adequate curing times for each stage. Don’t rush the curing process; it’s critical for durability and preventing future fix drainage problems in a bathroom.
2. What’s the typical cost involved?
Costs can range widely. For a DIY self-leveling compound solution, you might spend a few hundred dollars on materials (compound, primer, tools). If you’re opting for a new shower pan, especially a custom-tiled one, material costs for mortar, waterproofing membranes, drain assemblies, and tiles can run into several hundred to over a thousand dollars. If you hire a professional, labor costs will add significantly, ranging from $1,500 to $5,000+, depending on your location, the complexity of the job, and the extent of demolition and reconstruction required. This is why understanding DIY bathroom drainage solutions can save you considerable money.
3. Is fixing the slope a ‘quick fix’ or a major project?
While some aspects might feel like a quick fix if you’re only adjusting a very minor inconsistency with compound, rectifying a shower floor slope problem is generally a significant project. It requires careful preparation, precise application, and strict adherence to curing times. There aren’t many true ‘quick fixes’ for structural issues like an incorrect slope that will provide a lasting solution. Any attempt at a shortcut is likely to lead to recurring bathroom drainage issues and more costly repairs down the line. We aim for lasting easy bathroom drainage fixes, not temporary patches.
4. Do I need to re-tile my entire shower floor after fixing the slope?
In most cases, yes. Whether you use self-leveling compound or install a new shower pan, the existing tiles will almost certainly need to be removed. Self-leveling compound creates a new sub-surface upon which new tiles are laid. A new shower pan involves a complete reconstruction of the base, necessitating new tiles. This gives you an opportunity to refresh your shower’s look while ensuring a perfectly draining floor. This commitment is part of an effective bathroom slope repair.
5. When should I call a professional instead of doing it myself?
While this guide provides detailed instructions for DIY bathroom drainage solutions, there are situations where professional help is advisable. If you encounter extensive water damage to your subfloor, discover structural issues during demolition, or if you’re simply not comfortable with the intricate steps involved in plumbing connections, waterproofing, and mortar work, calling a qualified plumber or contractor is the smartest decision. They have the expertise, specialized tools, and insurance to handle complex situations, ensuring the job is done correctly and safely. Don’t hesitate to seek help if the project feels beyond your current skill set; sometimes, the best how to improve shower drainage tip is knowing when to delegate.
By following these detailed instructions and understanding the nuances of each approach, you’ll be well-equipped to tackle your shower’s drainage issues head-on. A properly sloped shower floor is not just about functionality; it’s about preserving the integrity and value of your home.
TL;DR: Your Quick Guide to Fixing Shower Drainage
Persistent puddles in your shower are a clear sign of bathroom drainage issues, often caused by an incorrect shower floor slope. This isn’t a problem to ignore, as it can lead to mold and costly damage. The good news is, with the right approach, you can effectively fix drainage problems in a bathroom yourself. Here’s a summary of the key steps for DIY bathroom drainage solutions:
- Diagnose the Problem: Use a visual inspection and a water test to confirm if water pools, indicating a poor slope (ideally 1/4 inch per foot towards the drain).
- Choose Your Method:
- Self-Leveling Compound: Best for minor inconsistencies. Requires cleaning, priming, careful mixing, and guiding the compound to create the correct slope. It’s an easy bathroom drainage fix but demands precision.
- New Shower Pan Installation: For severe slope problems or major renovations. Involves demolition, precise drain installation, creating a pre-slope, critical waterproofing, and then building the final mortar bed with the correct pitch before re-tiling. This is an effective bathroom slope repair.
- Prevent Future Issues: Implement fixing shower floor slope tips beyond the repair. Use drain screens, clean regularly, avoid dumping grease, and inspect grout and caulk. Proactive maintenance is key to how to improve shower drainage long-term.
- Consider Professional Help: If the project feels too daunting, or if you encounter structural damage, don’t hesitate to call a professional. While you might seek a quick fix, proper drainage solutions are often comprehensive projects that require careful execution.
By following these guidelines, you’ll ensure your shower drains properly, keeping your bathroom healthy and functional.

